D365 Portals – tokenhtml

If you need to refresh the __RequestVerificationToken on your page, this is stored as a hidden input field but can be generated on demand by loading /_layout/tokenhtml.

In my case, I apply the token to a form posting to ensure the request is valid.

    $("#antiforgerytoken").load("/_layout/tokenhtml", function() {
        console.log("tokenhtml loaded");
        $("form>input[name='__RequestVerificationToken']").val($("div#antiforgerytoken>input[name='__RequestVerificationToken']").val());
});

D365 – System Views – Does Not Contain Data

The Advanced Find functionality within D365 v9 allows us to search for records that have no data in a related entity – a NOT IN query. For example, provide a list of Contacts that are not the Primary Contact for an Account.

advanced-find-NOT-IN

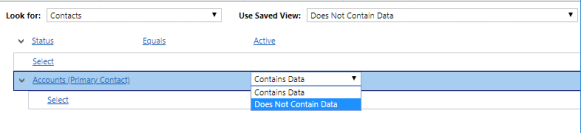
However, if we try to create the same using a System View there is currently no option to do a NOT IN query.

system-view-filter

To create a System View which contains a NOT IN query I had to complete the following steps.

  1. Create a basic System View with the required column layout and Publish the View.
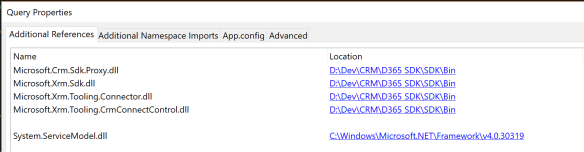
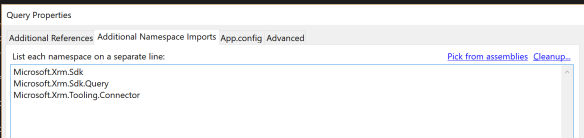
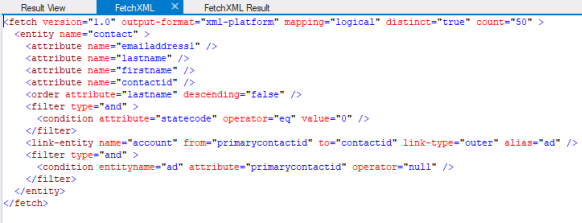
  2. Using XrmToolBox and the View Designer Plugin I opened the System View and edited the query (using FetchXML Builder)
  3. Finally, save and publish the changes to the System View.

NOT-IN-FetchXML

A few things I have found when creating NOT IN System Views.

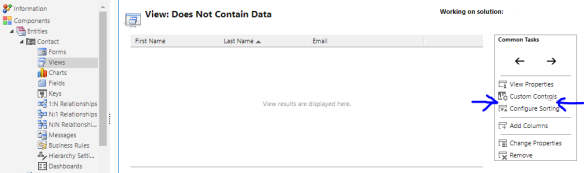
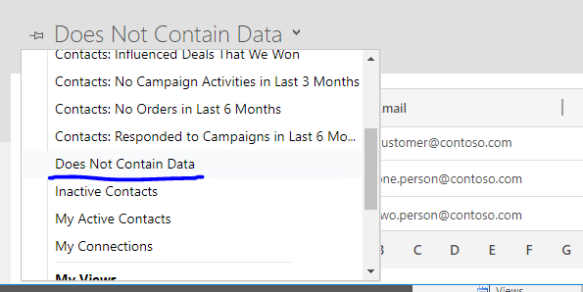
    1. The System View does get created in the list of System Views for the entity and displays the correct content.

system-view-1

    1. When you open the Advanced Find from the System View, the filters for the System View are displayed correctly but the name of the System View we created is not listed.

system-view-2

    1. When you re-open the System View in the D365 solution after you have made the NOT IN modification, the option to Edit the filter criteria is no longer available. Any additional changes to the System View would need to be made using the XrmToolBox View Designer Plugin.

system-view-3

D365 Portals, Liquid Templates and FetchXML

My challenge today was to create a Web Template for a D365 Portal that returned a JSON object from a FetchXML query. There are a few blog posts around on how to achieve this, including this one from my colleague Nadeeja.

The complication for me was the FetchXML contains an ‘in’ operator which would contain a dynamic number of values.
fetchXML
The solution requires the creation of a Liquid array which can then be used in the construction of the FetchXML. To create the array I pass a comma separated list of values of GUIDs I need included in the query. Using the Liquid Assign variable tag i can create the array.
{% assign groupIds = request.params['groupIds'] | split: ',' %}
Within the Web Template I can iterate through the array as part of the construction of the FetchXML query.
fetchXML-2
To test the response I created a POST within Postman to the URL and supplied the named parameter, groupIds, as a comma separated list of values. The POST request is made using form-data and returns the relevant number of items based on the number of items in the groupIds array.
postman

Visual Studio 2017 – NETFramework Versions

If Visual Studio 2017 is not displaying the relevant Target Frameworks for your machine then it may be that the targeting packs are not installed on your machine.

Run the Visual Studio Installer (from within Visual Studio, select Tools | Get Tools And Features) and select the necessary targeting packs.

When you restart Visual Studio you will find the Target Frameworks have been added to the list.

Useful links…

Troubleshoot blocked .NET Framework installations and uninstallations

How to: Determine Which .NET Framework Versions Are Installed

Snipping Tool – Save As not working

If your Save option in the Windows Snipping Tool is not working have a look at the Registry Setting for My Pictures under Computer\HKEY_CURRENT_USER\Software\Microsoft\Windows\CurrentVersion\Explorer\User Shell Folders

If it is pointing to an invalid location, for example you have previously modified a drive letter, you may need to update this to the correct location. Just make sure you restart the Snipping Tool when you have made the Registry Correction. Please note, any modifications you make to the Windows Registry are made at your own risk.

Using PowerShell to get a D365 record count

The Microsoft.Xrm.Data.PowerShell module provides a number of very useful functions for getting information from Microsoft CRM/D365 using PowerShell. The Get-CrmEntityRecordCount is just one of those functions but it only returns a count of all records for an entity. What if I need a record count for a filtered view? Fortunately, this is where the Get-CrmRecordsByFetch function can be combined with FetchXml aggregation.

# Create my connection to D365
$conn = Connect-CrmOnlineDiscovery -InteractiveMode

# Create my FetchXML with the relevant filter to return an aggregate (Count)
$count = Get-CrmRecordsByFetch -conn $conn -Fetch @"
<fetch version="1.0" output-format="xml-platform" mapping="logical" distinct="false" aggregate="true">
    <entity name="msdyn_workorder">
        <attribute name="msdyn_name" alias="msdyn_name_count" aggregate="count" />
        <filter type="and">
            <condition attribute="createdon" operator="on-or-before" value="2018-02-01" />
        </filter>
    </entity>
</fetch>
"@ 

# Get the actual number of records from the AliasedValue
$count.CrmRecords[0].msdyn_name_count

HTTP Actions and 202 Responses

When calling a Function App that returns a 202 (Accepted) Status Code I found my HTTP action in my Logic App was returning a status code of 405 with the a message of “The HTTP ‘GET’ method is not supported by the ‘GenericJsonWebHookReceiver’ WebHook receiver.”.

This seemed a bit odd because I had tested my Function App using the exact same request using Postman and it was returning a valid 202 response. After reading a bit more about HTTP Actions (https://docs.microsoft.com/en-us/azure/logic-apps/logic-apps-workflow-actions-triggers#http-action) the section on Asynchronous Patterns gave me the answer. To disable the asynchronous behavior previously described, set operationOptions to DisableAsyncPattern in the action inputs. In this case, the action’s output is based on the initial 202 response from the server.

Having made this change to the Logic App the server response was accepted and considered a success.

Azure Web App – Read local XML file

I needed a way to get read access to a local XML file in the Azure Web App that is not a .config file. Using the standard naming format for the root folder I can read the XML data file into a DataSet.

DataSet dataSet = new DataSet();
var wscXML = string.Concat(Environment.GetEnvironmentVariable("HOME", EnvironmentVariableTarget.Process), @"\site\wwwroot\wsc.xml");
dataSet.ReadXml(wscXML);

LINQPad – D365 Connections

You can create connections to Dynamics 365 (CRM 2016 etc) without using the LINQPad CRM Driver.

  1. Create a new query
  2. Select Query | References and Properties from the menu (F4)
  3. Add the following references to the Query Properties
  4. linqpad-d365-1
  5. If you have an assembly with Early Bound entities you can also add it here.
  6. Open the Additional Namespace Imports tab and select the following namespaces. Include any Early Bound entity namespaces here too.
  7. linqpad-d365-2
  8. Enter the following code into LINQPad to make your connection and generate your queries.
  9. The Util.GetPassword is the LINQPad utility method for retrieving a password encrypted in the LINQPad Password Manager.
void Main()
{
 string url = "https://mycompany.crm6.dynamics.com"; 
 string username = "mycompany.user@mycompany.onmicrosoft.com";
 string password = Util.GetPassword("d365-crmadmin");
 
 CrmServiceClient conn = new CrmServiceClient($"Url={url};Username={username};Password={password}; AuthType=Office365");

conn.OrganizationServiceProxy.Timeout = new System.TimeSpan(0, 3, 0);
 
 conn.OrganizationServiceProxy.EnableProxyTypes();
 
 IOrganizationService orgService = conn.OrganizationWebProxyClient != null ? (IOrganizationService)conn.OrganizationWebProxyClient : (IOrganizationService)conn.OrganizationServiceProxy;

Context = new XrmServiceContext(orgService);

// Write your queries as normal
 // var myQuery = from a in Context.AccountSet where ....
}

public XrmServiceContext Context { get; set; }


Visual Studio & Node JS

When you install Visual Studio 2017 it very kindly gives you the option to install Node.js

The only problem with this is that if you are not using v15.3 (or greater) of VS2017 then working with Azure Functions can present a couple of unusal issues.

  • Not being able to install the Azure Client Tools.
  • My application not being able to read from the local.settings.json file using the WebConfigurationManager.

The problem turned out to be the version of Node.js that was installed with Visual Studio and that I needed to update it to a more recent version. After completing the updated installation I was able to install the Azure tools and successfully read values from my local.settings.json file in my local development environment.